

Kai Settings
Configure Kai's tool permissions, system instructions, context files (knowledge files), and skill files — in the UI or programmatically via the Storage Files API.
Kai’s settings let you personalize how Kai behaves in your project. Open the Kai chat panel and click the Settings icon (gear) to access them. Settings are per-user and per-project, so each team member can configure their own preferences independently.
The settings panel has two tabs: Tool Permissions and System Instructions. Project-wide customization — project-level instructions, context files, and skill files — is managed in Settings → Kai Agent in the main Keboola navigation (the tab is labeled Kai Assistant in projects not yet upgraded to the new Kai engine).
Tool Permissions
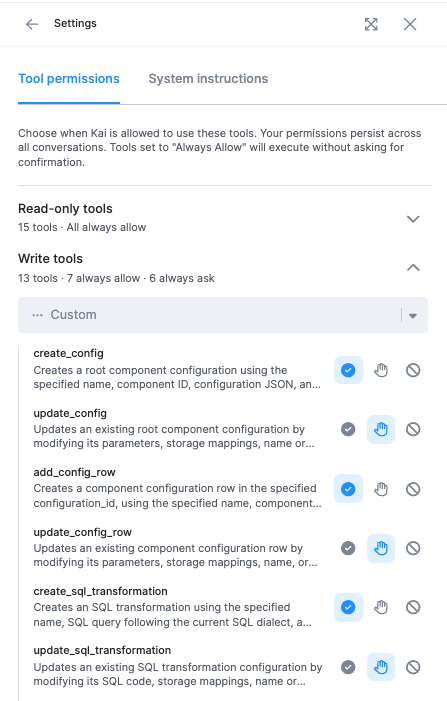
Section titled “Tool Permissions”Tool Permissions let you control which tools Kai is allowed to use. This eliminates the need to manually approve each action — you can pre-approve tools you trust and block those you don’t want Kai to use.
These are your own settings. They apply to your Kai in this project and change nothing for your teammates, who set their own.
Tool Categories
Section titled “Tool Categories”Tools are organized into two categories:
- Read-only tools — Tools that only read data from your project (e.g., listing tables, reading configurations). By default, all read-only tools are set to Always allow.
- Write tools — Tools that can create or modify resources in your project (e.g., creating configurations, updating transformations, running jobs).
Permission Levels
Section titled “Permission Levels”For each tool, you can set one of three permission levels:
| Permission | Behavior | |
|---|---|---|
 | Always allow | The tool runs automatically without asking for confirmation. |
 | Always ask | Kai must request your approval each time before using the tool. |
 | Block | The tool is completely disabled and Kai cannot use it. |
Setting Permissions
Section titled “Setting Permissions”You can configure permissions in two ways:
- From the Settings panel — Open Settings → Tool Permissions, find the tool, and select the desired permission level.
- From the approval dialog — When Kai requests approval for a tool, click Always allow to automatically approve that tool for all future uses.
Your permissions persist across all conversations within the same project.
System Instructions
Section titled “System Instructions”System instructions are standing rules Kai follows in every conversation, so you stop repeating yourself. “Always use snake_case.” “Prefix staging tables with stg_.” “Respond in German.”
They exist at two levels. Project-level instructions apply to everyone in the project. User-level instructions are personal to you and are added on top. Both are included in every conversation.
Instructions are the place for short rules. For longer knowledge, such as data standards and project-wide conventions, use context files. For a step-by-step procedure you invoke when you need it, use skill files.
Project-Level Instructions
Section titled “Project-Level Instructions”
Project-level instructions apply to all users in the project. They are managed in the project settings:
- Go to Settings → Kai Agent in the main Keboola navigation.
- Enter your instructions in the System instructions text field.
- The instructions auto-save.
Use project-level instructions for team-wide standards such as:
- Naming conventionse.g., “Always prefix staging tables with
stg_and use snake_case for all column names.” - Coding standardse.g., “Write SQL transformations using CTEs instead of subqueries. Always include comments explaining business logic.”
- Pipeline conventionse.g., “Load
in.c-*buckets incrementally and never modify them in place. Build output tables from staging tables instead of one deep query.”
Project-level instructions can be edited by project admins and managers.
User-Level Instructions
Section titled “User-Level Instructions”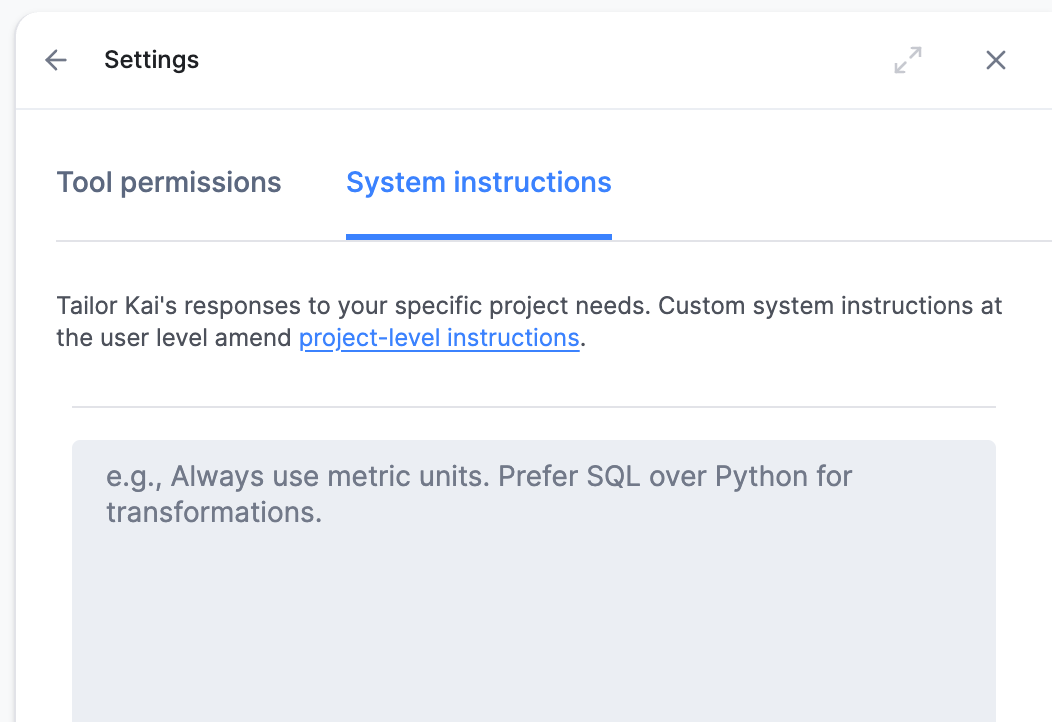
User-level instructions are personal to you and are added on top of the project-level instructions. They are configured in the Kai chat panel:
- Open the Kai chat panel
- Click the Settings icon.
- Select the System Instructions tab.
- Enter your instructions in the text field
- The instructions auto-save
Use user-level instructions for personal preferences such as:
- Response stylee.g., “Keep explanations concise. Always show the SQL query before executing it.”
- Preferred workflowse.g., “Always create transformations in a dev branch first.”
- Language or formattinge.g., “Respond in German. Use metric units.”
How Instructions Are Applied
Section titled “How Instructions Are Applied”When you start a conversation with Kai, both levels of instructions are included:
- Project-level instructions are applied first.
- User-level instructions are appended on top.
This means user-level instructions can refine or add to the project-level instructions but cannot override Kai’s core system rules.
- Each instruction field supports up to 4,000 characters.
- Keep instructions clear and specific — vague guidelines are less effective.
- Update instructions as your project evolves and conventions change.
- Focus on rules Kai can’t infer from your project data alone (e.g., team conventions and preferences).
- If Kai doesn’t seem to follow an instruction, try rephrasing it more directly.
- For knowledge that outgrows the 4,000-character limit, such as data standards and project-wide conventions, use context files instead.
Context Files
Section titled “Context Files”Context files (also called knowledge files) are Markdown documents that Kai reads automatically at the start of every conversation. Use them to give Kai project knowledge that is too long for system instructions: data standards and project-wide conventions. Kai cannot open links for security reasons, so anything it needs to read has to arrive as a file. Reference material for a single task, such as the documentation for one external system, is better placed in a skill file, which is loaded only when the skill runs.
To manage them, go to Settings → Kai Agent in the main Keboola navigation and use the Context files card:
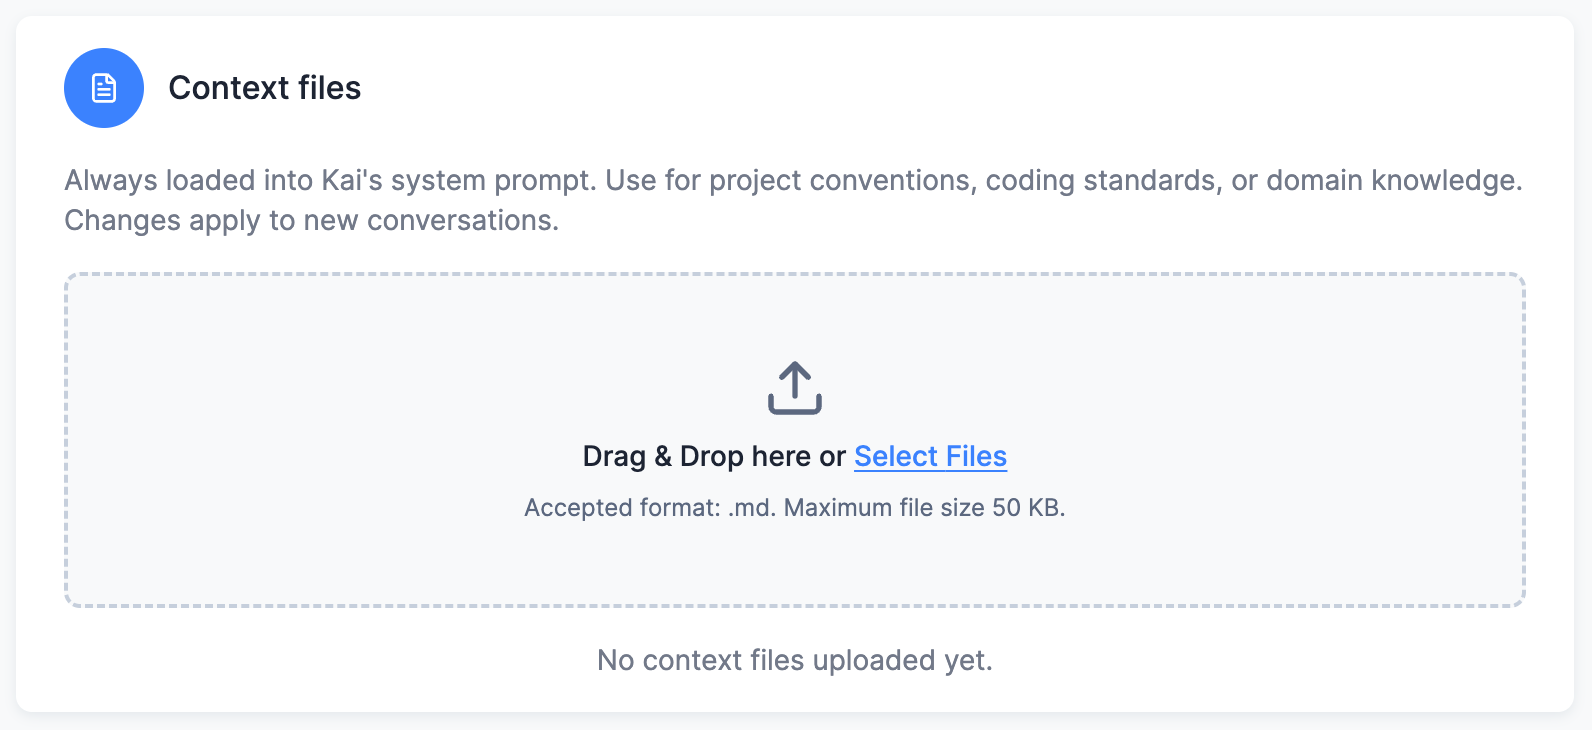
- Drag a Markdown (
.md) file onto the card, or click Select Files. - The file is uploaded and takes effect in every new conversation (running conversations are not affected).
- To replace a file, upload the new version and delete the old one.
Rules and limits:
- Format: Markdown (
.md) only. - Size: up to 50 KB per file.
- Count: up to 10 files per project.
- A file named
CLAUDE.mdbecomes Kai’s top-level memory file; all other files are loaded as always-on rules alongside it. - Context files apply project-wide — every user’s conversations include them.
Example
Section titled “Example”A context file is ordinary Markdown with no required structure. Give it headings and keep it to things Kai cannot work out from the project itself:
# Data standards
## Buckets
- `in.c-*` holds raw extractor output. Never modify it directly.- `out.c-*` holds tables other teams and BI tools read.
## Naming
- Staging tables take an `stg_` prefix.- Columns are snake_case.- Timestamps end in `_at` and are always UTC.
## Transformations
- Avoid deep chains of CTEs. Split a long query into intermediate staging tables and  assemble the final output table from those.- Materialize anything more than one transformation reads instead of recomputing it.- Filter and deduplicate before joining, not after.- List columns explicitly when writing an output table. No `SELECT *` into a table  other teams depend on.- An incremental load needs a primary key. Full loads are for  small lookup tables only.
## Integrations
- When a new integration is needed, prefer a Custom Python component over the  Generic Extractor.
If you upload only one file, name it CLAUDE.md so it becomes Kai’s top-level memory file.
Under the hood, context files are ordinary Storage Files tagged kai-context, which means you can also manage them programmatically — see Managing Files via API or CLI.
Skill Files
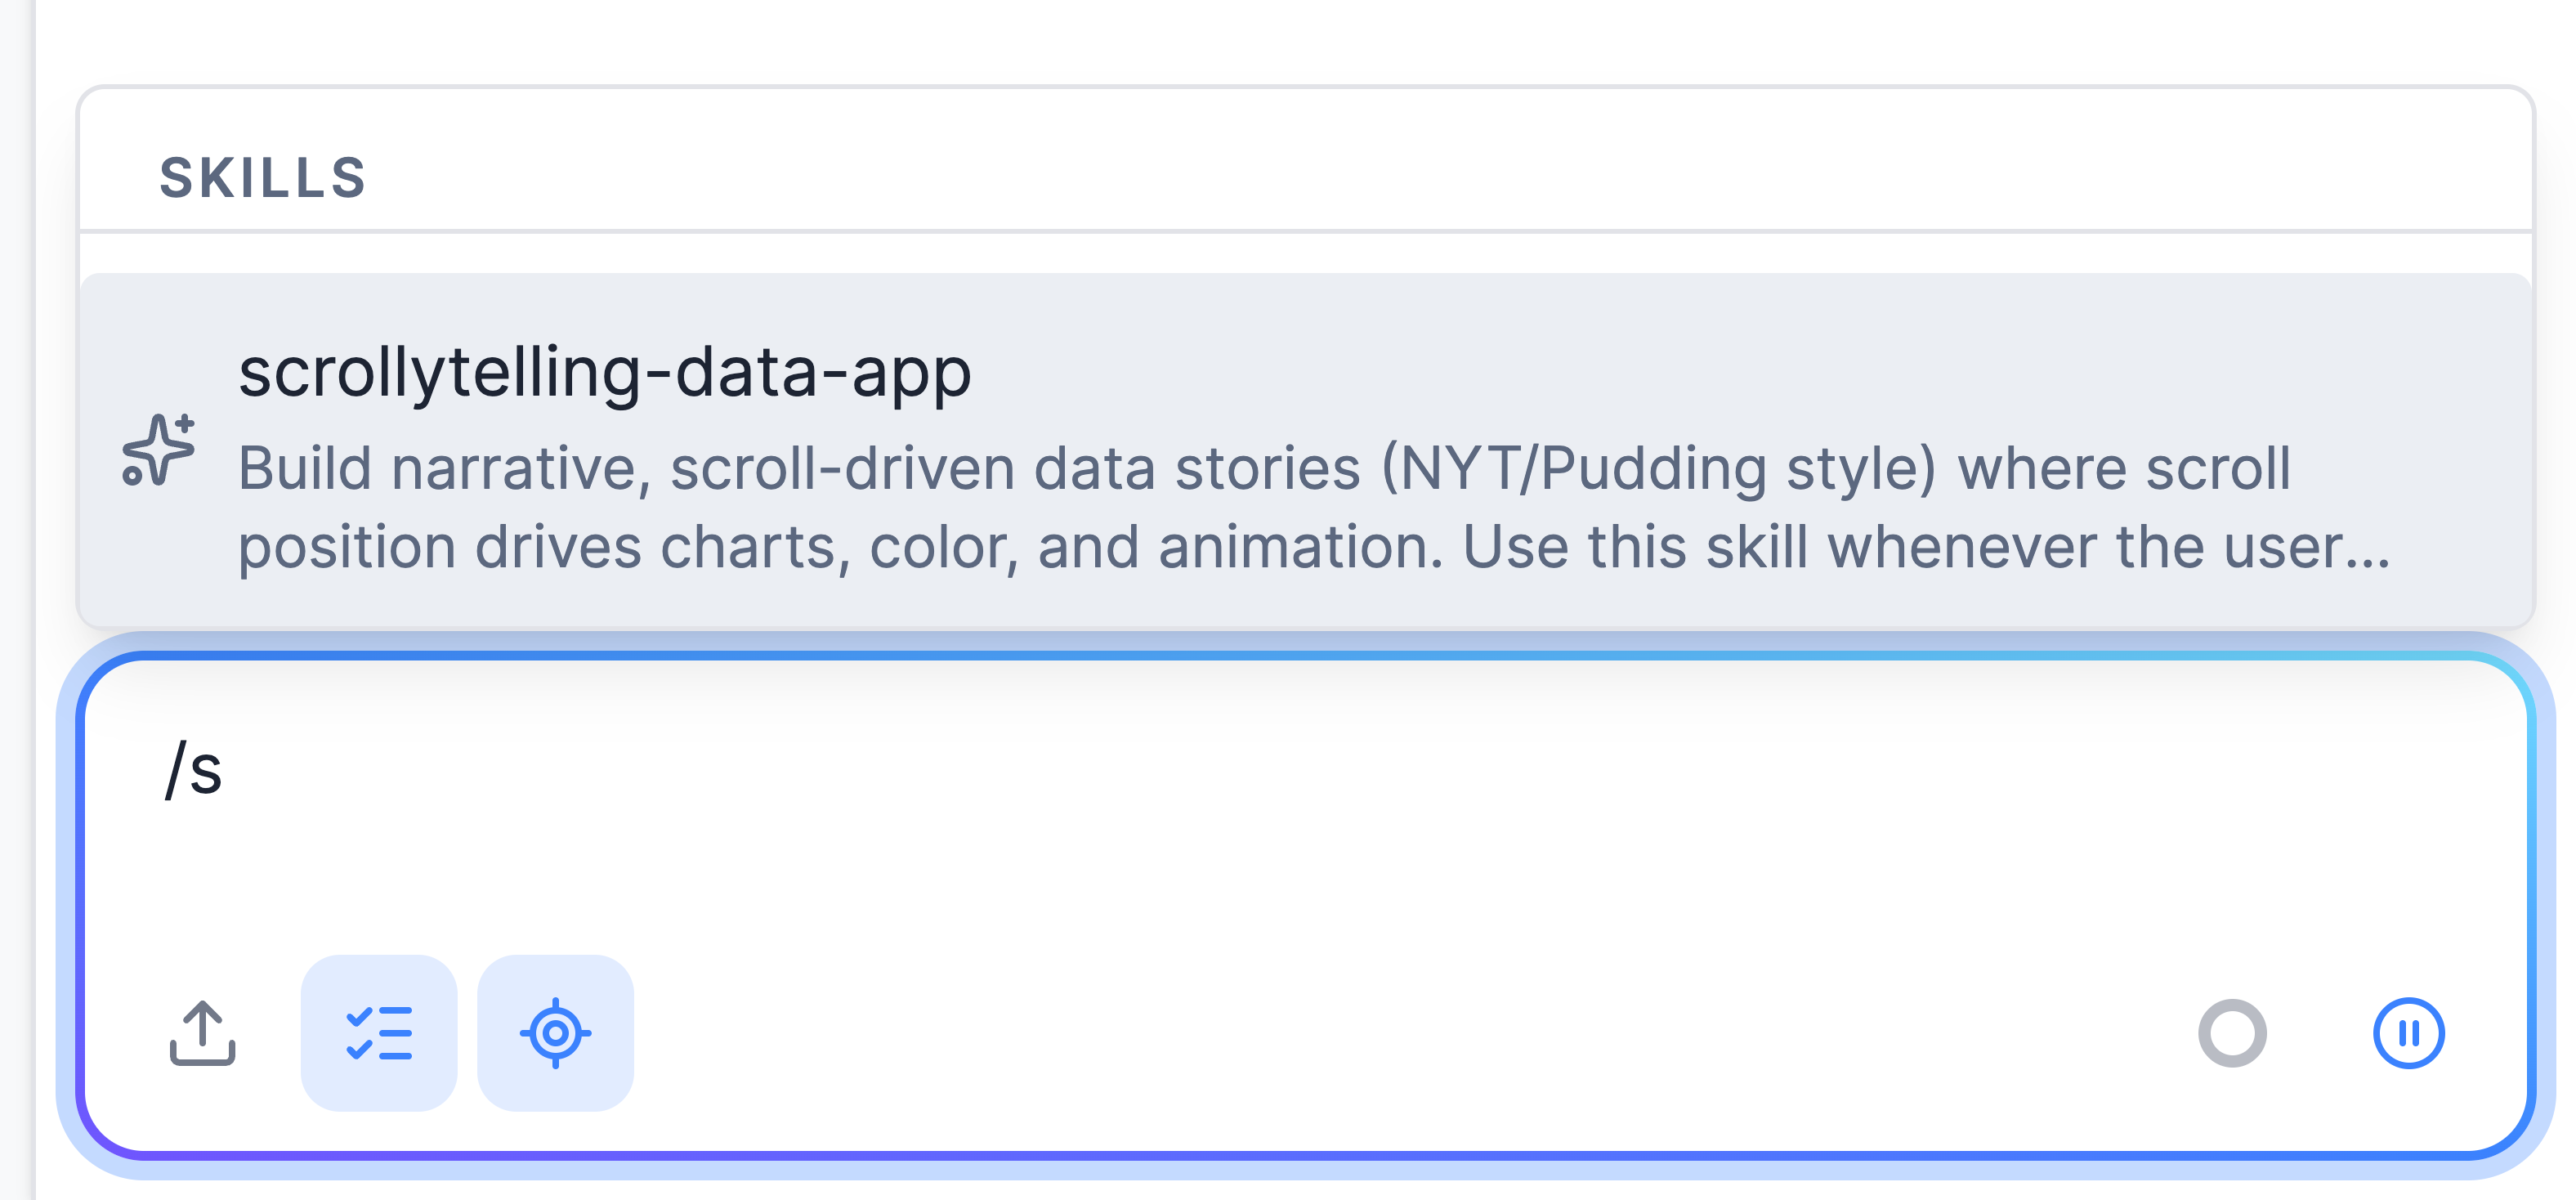
Section titled “Skill Files”A skill is a playbook Kai runs when you need it. The skills you upload appear in the chat’s / slash-command menu. Use them for longer, task-specific instructions such as “build the monthly report” or “onboard a new data source”. Kai also carries built-in skills that it invokes on its own when they are relevant; those are not listed in the menu.
Kai skills use the open Agent Skills format: a Markdown file with name and description frontmatter, optionally packaged with the supporting files it references.
Manage them in Settings → Kai Agent using the Skill files card.
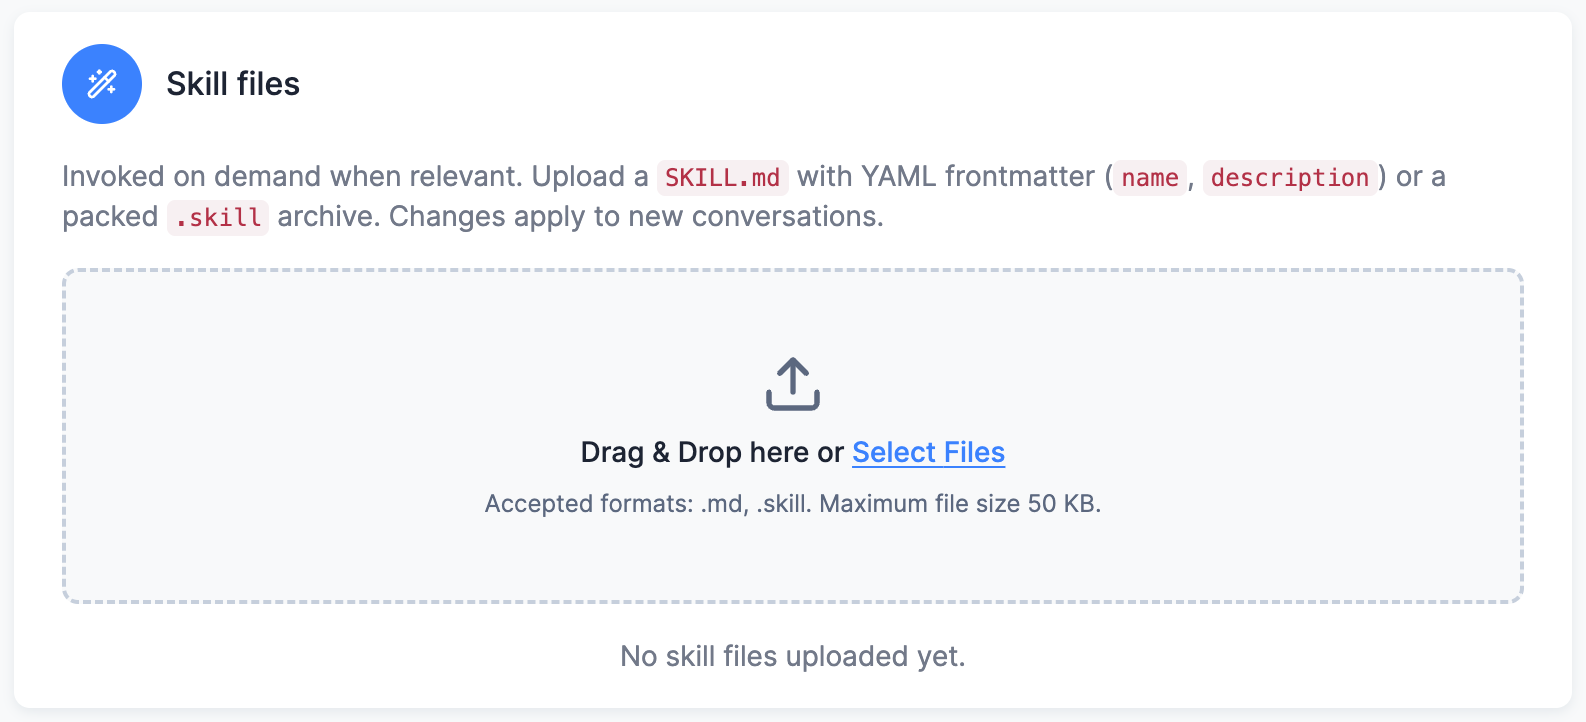
Two formats are accepted:
-
A single
.mdfile starting with YAML frontmatter. Thenameanddescriptionfields are required — the description tells Kai when to invoke the skill:---name: monthly-reportingdescription: Build the monthly revenue report. Use when the user asks for the monthly report or KPI refresh.---# Monthly reportingStep-by-step instructions for Kai... -
A
.skillarchive — a ZIP file with aSKILL.mdat its root (or at the root of a single top-level directory), plus any supporting files the skill references.
Rules and limits:
- Size: up to 50 KB per file.
- Count: up to 10 skill files per project.
- A project skill with the same
nameas a built-in skill replaces the built-in one.
Skill files are Storage Files tagged kai-skill.
How a skill gets invoked
Section titled “How a skill gets invoked”You can call a skill in two ways:
- Call it yourself by typing
/in the chat and picking it from the menu. - Let Kai call it when your request matches the skill’s
description.
Kai reads only each skill’s name and description up front, then loads the body when it
decides the skill applies (progressive disclosure). That makes the description decisive
for skills Kai invokes itself. Write what it does, then when to use it, in the words your
team actually types:
description: Build narrative, scroll-driven data stories where scroll position drives charts, color, and animation. Use whenever the user wants a "scrollytelling" app, a "data story", a "narrative dashboard", or wants to turn a dataset into a guided scrolling experience instead of an explore-it-yourself dashboard.Compare that with description: Data stories, which gives Kai nothing to match on.
What to write a skill for
Section titled “What to write a skill for”Write a skill when you want Kai to do something a particular way, every time.
- House style. Your brand palette, layout conventions and component choices, so every data app someone builds looks like it belongs to your company.
- A recurring procedure. Month-end close, onboarding a new data source, the same set of quality checks.
- A specialised output Kai would not produce by default, where the instructions run to
pages rather than paragraphs. This is what
.skillarchives are for: aSKILL.mdplus reference files it can read when needed.
Skills are project-wide, so one person can encode the standard once and the whole team gets it.
For writing the skill itself, the Agent Skills project publishes
best practices for skill creators:
how to structure SKILL.md, how long to make it, and when to move detail into separate
reference files.
Managing Files via API or CLI
Section titled “Managing Files via API or CLI”Because context and skill files are ordinary Storage Files identified by a tag (kai-context or kai-skill), any Storage API client can manage them. Upload with the tag and the permanent flag (so the file never expires):
List current files by tag:
GET https://connection.{stack}/v2/storage/files?tags[]=kai-contextX-StorageApi-Token: {token}Upload a new file (Storage import service, multipart form — see the ?service=import section of your stack’s API reference):
POST https://import.{stack}/upload-fileX-StorageApi-Token: {token}Form fields: data=@data-standards.md, tags[]=kai-context, isPermanent=1Delete a file by ID:
DELETE https://connection.{stack}/v2/storage/files/{fileId}X-StorageApi-Token: {token}Or use kbagent, the Keboola CLI:
kbagent storage files --project myproj --tag kai-contextkbagent storage file-upload --project myproj --file data-standards.md --tag kai-context --permanentkbagent storage file-delete --project myproj --file-id 12345 --yesKeeping a Context File in Sync Automatically
Section titled “Keeping a Context File in Sync Automatically”A common pattern: your team maintains a standards document in its own repository or wiki, and a scheduled job keeps Kai’s copy current. Kai then answers standards questions from the actual document, and it stays up to date without manual re-uploads.
On each run, the sync job should:
- List files tagged
kai-contextand note the ID(s) of the current copy (match by file name). - Upload the fresh version with the
kai-contexttag and the permanent flag. - Delete the old file ID(s) from step 1.
Upload-then-delete (rather than delete-then-upload) ensures a conversation starting mid-sync still finds a copy. Deleting the old copy is required: Kai loads at most 10 tagged files, and both revisions would otherwise be loaded together.
The job can run anywhere — a CI pipeline triggered on changes to the source document, or a scheduled Keboola flow with a Python step calling the Storage API. It only needs a Storage API token with file write permissions. The same pattern works for skill files using the kai-skill tag.
Troubleshooting
Section titled “Troubleshooting”- File uploaded but Kai doesn’t see itcheck that the tag is exactly
kai-contextorkai-skill, the file is under 50 KB, there are at most 10 tagged files, and the conversation was started after the upload. - Skill shows without a description, under a wrong name, or Kai doesn’t invoke itadd
nameanddescriptionto the.mdfrontmatter. Uploads from the Settings UI enforce the frontmatter, but API uploads don’t — a file without it still appears in the/menu under a name derived from its file name, with no description to tell Kai when to use it. A.skillarchive must containSKILL.mdat its root (or at the root of a single top-level directory). - File expired or disappearedit was uploaded without the permanent flag; re-upload it as permanent (uploads from the Settings UI are always permanent).